"Hey Jude ... take a sad song & make it better!" - the Beatles

My goal is to turn my disabilities around to abilities using art therapy as a means of stroke rehabilitation on my hands & arms. I want to also use cards to spread kindness, show different fun card techniques, bring awareness to issues that are important to me, and to just spread joy in general!

Sunday, July 23, 2017

Using Dies Only for Embellishment - Dog Series Four

I wanted to create this little video because I have a few dies and die sets that do not have the stamp sets that go with them.  They were either gifts or the stamp sets were not available at the time I purchased the dies but I still wanted to use them.  So, I decided to create four cards using the dies as the main embellishment feature and only adding sentiment stamps when necessary as a secondary element.

I first picked out a couple of dies that were dog related.  I got one as a gift from Lizi and Love from Lizi and the other ones I got on ebay for a very reasonable price, but they are both Simon Says Stamp items.  I cut the dies out of the card stock in order to create a stencil.  I wanted to add some color to the panels that I pulled and use the corresponding dies.

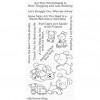
On the first card, I used a pink card base from Simon Says Stamp and the cute little dog die and used Broken China, Barn Door, and Mowed Lawn Distress inks to create the stenciled effect.  I wanted some primary colors on the pastel card bases that I chose.  I also used the die to outline the shapes once they had dried to give it a little more pop.  I ran the card panel through the die cutting machine with the Sunshine Layers border die and adhered the panel onto the card base.  I then added the sentiment from the My Favorite Things Playful Pups stamp set.  Finally, I added the two original white dogs cut out from the die and left them stark white with wink of stella glitter on them to give the card a nice pop.

For the second card, I took a die that I received as a gift from the wonderful Lizi at Love From Lizi.  It looks like a pitbull and that is why she sent it to me - she knew that I would love it!  I wanted to a different type of look on this card so I only stenciled three of the dogs at the bottom of the panel rather than all over as in the previous example.  I then cut the panel with the Avery Elle Wonky Stitches die and adhered it to the Simon Says Stamp card base that I had ready.  I attached the stark white die cut piece of the pitbull to the card and, again, added wink of stella for that minimalistic look.  I did add a sentiment from the Paper Smooches Lucky Dog set in red ink from Catherine Pooler.

On the third card I had a die that cut out paw prints but also cut out a circle.  So, I kept the paw prints that were cut out to go for the similar look as before and then used the stencil to create a few circles up the side of the card panel.  I then cut those panels to create a unique looking edge and attached the white die cut pieces to the circles with foam tape.  Once again I added wink of stella and a sentiment and this card came out just as cute as the others!

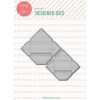
For the final card I wanted to do something a little bit different.  I still used a die to create a stencil and then stenciled the color on as before in a random pattern to create my owed patterned paper.  But I also had the die cut out of the middle top of the panel so that I could create a shaker card.  I used the MFT Blueprints 24 die to create the stitched edging on this card and then I attached the acetate and the foam strips necessary to the back of the panel. I poured some sequins from Kennedy Grace Creations onto the card base by Simon Says Stamp and then adhered the panel.  Done!  A cute little shaker card made only with dies!!!

I hope you enjoyed this video and these cards.  I hope that you would try to stretch your dies in a similar way as well.  I'm sure you guys have some fantastic ideas that you could send my way as well!  Thanks for being here and spending some of your time with me - Jude  :-)
________________________________

Social Media Links: (Please visit me for more fun art therapy!)
YouTube - Click HERE!
Hey Jude Cards Instagram - Click HERE!
Jude U Personal Instagram - Click HERE!
Snapchat Username - judeunnone
See you there!  Thanks!
________________________________
Supplies:

Friday, July 21, 2017

Tiny Messages - Stashback Friday (5)

I recently wanted to use this old stamp that I have that has a dog on it that says "Sealed with a slobber!"  It is such a cute stamp but I don't use it often enough.  When I stamped it and started to color the image in, it gave me an idea - what if I put some mini envelopes with tiny messages on the card?  I thought that would be super cute and I had an older die from Ellen Hutson that was the perfect match for this idea!

So, I started with the doggy card (of course).  I stamped the image and colored it in with my Spectrum Noir alcohol markers.  I then used some Simon Says Stamp card stock for the card base and added a rectangle and another half circle type shape that I had cut out of patterned paper with my MFT dies.  I cut the mini envelopes out of white card stock and did the folds to create the envelopes.  I then measured the width of the opening on each and cut a strip of paper slightly smaller.  Next, I took my score board and scored the strips of paper at an increment smaller than the height of the mini envelope.  I needed to find some stamps that would fit a message or two on these strips so I searched through all of my "mini" stamp sets that I rarely use.  I stamped these messages with Avery Elle Aquamarine ink to match the theme I had going on for this card.  I also ensured (on all of the cards) to include a little sentiment from the Lawn Fawn Push Here stamp set that says "Pull" or "Open"!  Finally, I folded them, put them in the envelopes and added some glitter to the card!  So cute!


I liked the idea so much that I decided to make a masculine and feminine card with a message inside the envelopes as well.  So, I used two more Simon Says Stamp card bases and cut the envelopes, the patterned paper, and the paper strips again.  For the feminine card I used patterned paper that I could then add some sparkle and shine to later.  I followed the same outline above for making the strips that went inside and added some sentiments from the CZ Designs stamp set that is rather snarky and fun!!!  I then added all different colors of Tonic Nuvo drops to the design and had a fun and feminine tiny message card!


For the masculine card I used some paper that I recently got from First Edition.  It has texture and spot gloss on it and I love their paper packs!  They make the simple things that much more fun!  I wanted to keep this one very plain and masculine so all I did was add the tiny message envelope to the front and decorate it with a little image from another one of my older mini stamp sets.  Again, I used a little bit of glitter to embellish - not too much because I plan on giving this to my husband - and I was good to go!  The message inside is from CZ Designs also and the phrase "Hey Shorty" is so cute, especially because my husband is a foot taller than me!!!


So, that was my "Stashback Friday" for this week.  Stashback Friday is a series that I do where I use older items in my stash so I remember that it is not all about what is new and next - but that I can use things I already have and still come up with some fun new things.  I hope you try it and look through your stash for something fun and different.  I know you will come up with amazing things!  Jude  :-)

___________________________________________

Social Media Links: (Please visit me for more fun art therapy!)
YouTube - Click HERE!
Hey Jude Cards Instagram - Click HERE!
Jude U Personal Instagram - Click HERE!
Snapchat Username - judeunnone
See you there!  Thanks!
___________________________________________
Supplies: